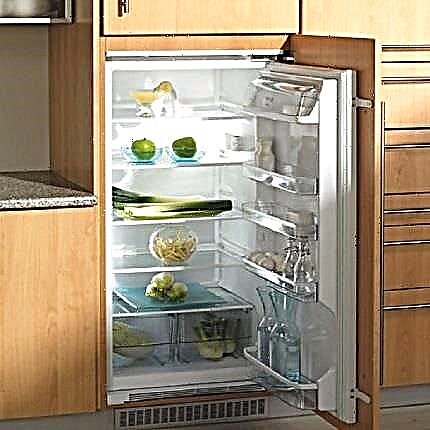
Installing a hood over a gas stove significantly improves the microclimate in the entire apartment. The smell of cooking food, steam with droplets of fat dissolved in it, and burning waste do not spread throughout the rooms, but get into the ventilation or disappear due to filtration.
Installation of a built-in or hinged structure is simple, does not require special skills and a lot of time. But sometimes the installation is complicated by the inconvenient arrangement of communications - for example, a gas metal pipe running in the center of the wall.
In this article we will try to find out how to install an extractor hood over a gas pipe in order to maintain both the integrity of communications and the serviceability of the cleaning device. And at the same time we recall that doing is strictly prohibited.
Is it possible to carry a gas pipe?
An absurd and technically unjustified arrangement of pipes in the middle of a wall is not so rare. There are options that confound the new settlers and nullify their plans for the installation of kitchen furniture or appliances.

The traditional location of the gas riser is in the corner, near the kitchen window. The main pipe with a plate is connected by a horizontal branch with a tap and a dielectric, connected by a welding method
To expand the possibilities, the outlet is increased with a flexible hose - in this case, the gas stove can be installed at a distance of up to 2-3 m from the end of the metal structure.
If the riser is not in the corner, but in the center, installing a hood or furniture modules is complicated. The same thing happens when the horizontal pipe segment is located not lower than the table level, which is convenient for masking it, and at a height of more than 150 cm - that is, in a place where the hood can potentially be mounted.
Horizontal bends are usually tolerated, but this requires the approval of the gas service. Gorgaz workers also carry out installation and welding work - gas communications are not allowed to be transported independently. The procedure is expensive and lengthy, so it is advisable to go through it, for example, when installing a gas meter.
The gas riser, like the ventilation hole, cannot be moved. A vertical metal pipe is part of the general building equipment, which in no case should be touched. It is forbidden by all regulatory documents, therefore it is better to think over the installation of the stove and the location of the hood in advance - just place them away from gas utilities.
You can learn more about gas equipment in a residential building at SNiP 2.04.08-87 * (in the current edition).

Modular kitchen furniture comes to the rescue - the pipes along the entire length are closed with a pencil case with doors, providing free access to the gas meter
If the ventilation hole is near the riser, it is not necessary to place a plate directly under it. There are many ways to connect it to the hood using a design of ducts.
Conclusion: so that the interior design does not suffer, it is easiest to rearrange the stove with the hood in another place. If finances allow and there is a desire, you can transfer the horizontal section of the pipe, but with the coordination of the gas service.
And for those who do not want to redo anything, we offer instruction on installing the hood on wooden blocks. This option is not the best from a technical point of view, but it can help out as a temporary solution or for mounting an exhaust device in the country.
Installation instructions for the hood above the pipe
It is not customary to install powerful, expensive equipment on some unstable devices, so we choose the appropriate device - low-power, dome or mounted type.
An extractor hood built into the cabinet is also suitable - then the module above the stove will protrude forward. This must be taken into account when choosing the mounting height, since the device should not interfere with cooking.
The easiest option is a mounted hood with carbon filters.

Inexpensive suspension-type devices cost 1,900-5,000 rubles; they purify the air by filtration or exhaust, create a slight vibration during operation
Other types of equipment are more powerful, heavier and more difficult to install, so their installation will require more time and skill.
So, we turn to the instructions on how to hang the hood with your own hands if the gas pipe interferes.
Step 1 - choosing an option for mounting the hood
Given that the gas pipe has a diameter of 40-50 mm and is located at a certain distance from the wall, we select the base material for attaching the hood. The thickness of this material should overlap the communications so that after installation they are behind the hood and not in contact with it.
In this regard, you can use such materials or fasteners:
- wooden blocks;
- chipboard fragments;
- metal brackets;
- anchor fasteners with studs.
Hinged fasteners - studs or brackets - can create vibration and additional noise during the operation of the equipment.
It is more advisable to create a base from the bars, and then make the installation of the device as if it were hung on a wooden wall.

Wood is a malleable and easy to process material. Fragments of the timber can be easily sanded, coated with an antiseptic, varnish or paint and fixed to the wall.
If the kitchen furniture is made of solid wood or “wood”, then the visible parts of a kind of “substrate”, combined with the interior, will not be evident.
Step 2 - preparing the tools and marking
For work, you will need tools with which the bars can be prepared, processed, and then fixed to the wall, as well as materials for processing:
- saw or jigsaw;
- sandpaper;
- tape measure and pencil;
- antiseptic impregnation, varnish, paint;
- dowels and long screws;
- screwdriver.
Mounting the hood is easy: the kit includes a mounting kit, and to fix the device on the wall, you only need a screwdriver. It is more difficult to fix the bars - you may have to drill a wall if it is concrete. Then a cordless drill will come in handy.
When all the tools are at hand, you can start marking.

It is necessary to find out what size bars will be required - for this, the length and width of the rear wall of the hood should be specified in the instructions in the diagram. For reliability, it is better if the wooden base is the same or slightly larger
The most successful option is 2 bars fixed to the sides of the pipe.
Very small whetstones may not support the weight of the equipment or, over time, deform under the weight of the exhaust device. Too large segments will interfere with the installation of furniture and spoil the interior.
Having decided on the dimensions, we mark the wall. The manufacturer’s instructions will also help in this - it indicates at what distance from the stove it is recommended to hang the hood. At the same distance, wooden supports must also be secured.
Step 3 - processing and installation of wooden blocks
Having ascertained the sizes of the bars, we take the board and saw off the fragments of the desired length. We cut them so that they match in all dimensions. Then we put the finished parts to the wall and apply a hood to them - we check whether the pipe is completely blocked.
If everything is in order, we process each bar with tools that extend the service life. Wood is very beloved by wood-boring bugs, and with high humidity it turns into a habitat of all kinds of microorganisms, fungi and mold.

Construction stores have a huge range of wood preservatives. Antiseptics are part of varnishes and paints, as well as impregnations that keep the appearance and texture of the tree unchanged
Before applying a protective layer to the bars, they should be sanded thoroughly with fine emery cloth, and the ends should be filed and also cleaned. So paints and varnishes lie better and penetrate deeper into the structure of wood.
When the paint or impregnation has dried, the bars must be fixed on the wall - on both sides of the gas pipe.

For a concrete wall, dowels are used, for a wooden one - just long self-tapping screws. It is necessary to make sure that the places of fastening the bars to the wall and the hoods to the bars do not coincide
If there are no screws at hand, nails will do. But they are usually not used due to difficulties with dismantling.
Step 4 - mounting the hood on the bars
The last step must be performed strictly according to the instructions proposed by the manufacturer. Particular attention should be paid to the distance from the working surface of the plate to the hood and the method of fastening.

Installation diagrams with a brief description of the sequence of actions are also in the instructions. It’s good if the kit also includes templates for marking on the wall - they facilitate installation
It is necessary to imagine that two bars - this is the wall, the basis for fixing. The principle of fastening is no different.
Please note that almost all hoods have an opening for connecting the duct in the upper part. It can be useful if, instead of filtering, a direct outlet to the ventilation shaft is used.
For mounting the “visor”, 2 or 4 fasteners will be required, for the “dome” - 4 or more. Fixation points are hidden under the body.

An alternative is to install the hood on the brackets - a structure made of metal profile. The device is mounted on the screws, the nuts tightly tighten
After installation, be sure to turn on the hood and check that the fasteners are secure during operation. If strong vibration occurs, it is better to redo it immediately - excess noise will interfere with being in the kitchen, and fluctuations can affect the performance of the device.
One of the main conditions for a positive result is the lack of contact between the hood and the pipe.
The simplest way to mount on the bars part 1:
The simplest way to mount on the bars part 2:
Installation on anchors and studs:
The metal gas pipe and hood in the kitchen should not be in close proximity. If this still happened, the best solution would be to move the stove away from the gas pipeline. Installing an exhaust device on some devices is an additional risk, especially when the pipe is near an open flame. We advise you to turn to this dubious method only as a last resort.
We also recommend that you consult a gas service specialist before starting any work. This will also serve as additional insurance if gas companies have further questions.
If you have already had to install the hood, if the gas pipe interferes, please tell our readers what difficulties they encountered during installation and how they managed to get out of the situation.