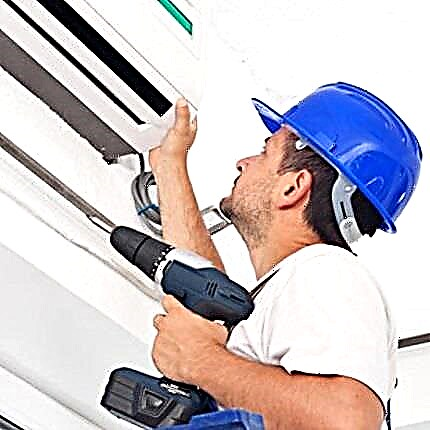
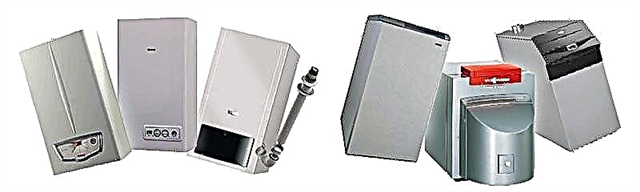
An automated process for supplying water from a well to an apartment building, garden and vegetable garden will help minimize the time planned for household chores. The "heart" of water supply networks are pumping stations for wells - devices that pump water from a source to a tapping point.
For their smooth operation, you need to know the nuances of the location, installation and connection of pumping equipment. Do you agree?
We will tell you how to choose the right pump station to provide water to a country house. Here you will learn all about the rules for laying water lines from the water intake to the house. Based on our advice, organizing a water supply with a well as a source will not cause the slightest difficulty.
How is the pumping station arranged?
The level of comfort in a country house is to a large extent determined by the presence of a professionally debugged water supply system, the main component of which is a pumping station.
The structure of devices involved in the organization of water supply must be known in any case. It will come in handy if you are laying the water supply yourself or entrusting installation work to professionals.
Knowing the principle of operation of individual elements of the system, in the event of an accident or in the event of a failure of one of the devices, you will be able to quickly and easily repair the pump station or replace it yourself.
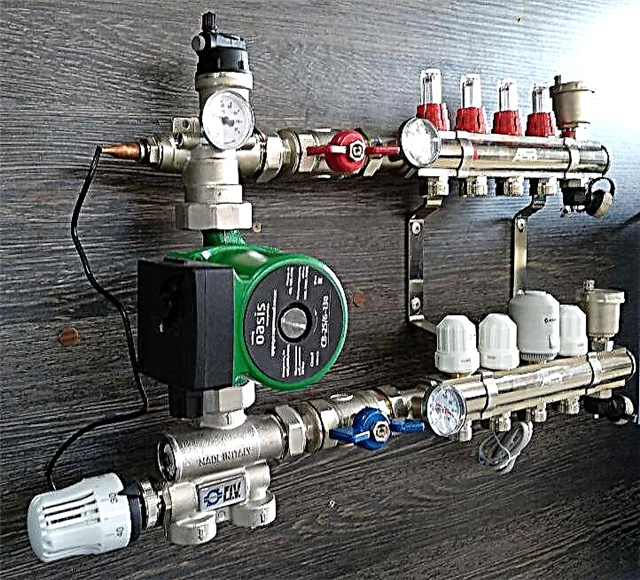
So, the most important components of a water supply scheme using a pumping station are the following:
- water intake device with filter;
- non-return valve that prevents the movement of water in the opposite direction;
- suction line - a pipe leading to the pump;
- pressure switch for adjusting the water supply;
- pressure gauge showing exact parameters;
- accumulator - automatic storage;
- electric motor.
Instead of a hydraulic accumulator, a more modern and practical device, an accumulation tank is sometimes used, which has several disadvantages (low pressure, inconvenient installation, etc.).

The diagram shows one of the methods for installing a pressure-free storage tank and hydrophore, capable of regulating the pressure and water level in the system
However, now that a lot of modern inexpensive models with a hydraulic accumulator have appeared in stores, there is no sense in assembling a system with a storage tank.
If you still decide to purchase a container for water collection, try to take into account the following nuances:
- The reserve tank is installed on the highest possible area (for example, in the attic) to create the necessary pressure.
- The volume of the tank must be such that a reserve of 2-3 days is maintained in case of failure of the pumping equipment (but not more than 250 liters, otherwise sediment may accumulate).
- The base for mounting the tank must be strengthened with beams, plates, additional ceilings.
The backup storage tank, like the membrane equipment (hydraulic accumulator), should be equipped with a filter. In addition, it is mandatory to install a safety pipe to drain excess water. The hose connected to the nozzle is discharged into the drainage system or lowered into containers intended for storing irrigation water.

The standard scheme of the pump station with the designation of the main elements: check valve, pressure switch, pressure gauge, pressure pipe; red arrow indicates accumulator
The principle of operation of the pumping station is cyclical. As soon as the supply of water in the system decreases, the pump turns on and begins to pump water, filling the system.
When the pressure reaches the required level, the pressure switch trips and turns off the pump.The relay settings must be set before the equipment starts to work - they depend on the tank volume and pump characteristics.
Image Gallery
Photo from
Mandatory components of pumping stations
Pressure switch or automation unit
Compliance with station operation requirements
Rules for the preservation of the pumping station
Well selection criteria
When buying a pumping station, you should pay attention to the pump parameters and factors characterizing the water source (in our case, the well), including its distance from the building.
For example, it will not be amiss to clarify the following values:
- Maximum depth of water intake. We are interested in a dynamic water level, that is, an average of 1-2 days with constant use of water. If we take into account the static level, then we can make mistakes in the calculations.
- Nominal pressure of the unit. The relative height of the water column, which is capable of creating pumping equipment. Calculated by the formula, summing the amount of suction, the length of the horizontal sections of the pipeline, vertical lift and transportation losses through the pipeline.
- Performance pumping station. For calculations, you can take the average water flow at all points of the drawdown (for example, a sink mixer - 0.15 m / s, a shower or a washing machine - 0.3 m / s). The total value should not be higher than the flow rate of the well, otherwise the source will not cope with the delivery.
- Supply voltage. In household networks, this is 220 V (except for powerful stations with three-phase motors, where the voltage is 380 V).
- Power consumption. The dispersion of energy consumed by the stations is impressive. An average of 500-2000 watts. The choice of the type of circuit breaker directly depends on the power.
- The volume of the reservoir tank. From 24 liters (for a family of 1-2 people) to 100 liters (6 people or more).
It is clear that without knowledge of the technical nuances before choosing and purchasing a unit it is better to consult a specialist who is well versed in domestic pumping equipment.

The characteristics of the pumping station are indicated in the technical data sheet of the product; to select the desired model, they must be compared with your own calculations
The choice of a pumping station for a well depends on the depth of production. For example, if the depth reaches 12-15 m, you need a device with a built-in ejector, more than 20 m - with an external ejector. Due to the ring-shaped suction, the lifting force of the water increases, but the efficiency drops sharply and the energy consumption increases.
How to choose a place for equipment?
To operate the pumping equipment, try to observe some conditions:
- minimum distance of the station from the water source;
- necessary temperature conditions;
- the ability to reduce noise;
- convenient location of equipment for maintenance.
Given these factors, the most suitable places for installing the station are the caisson, the basement of the house and the boiler room, although each place has its pros and cons.
A caisson is usually called a structure equipped in the ground. It is arranged right above the wellbore exit, while a deep foundation pit is excavated, which should be below the level of soil freezing. If the pump is not installed deep enough, it will not be able to work year-round, as during the first frost it will fail.

To make the caisson, concrete rings, brickwork, monolithic concrete blocks, metal cubes are used. The entrance to the caisson is located at the top of the structure and is a hatch with a tight-fitting lid.
Caisson requires waterproofing and additional insulation of the upper part - the roof. In addition, the volume of the room should be sufficient so that repairs can be made if necessary.
The advantage of installing the pumping station directly in the well-mounted caisson above the wellhead is that the operating unit will be located away from the living quarters and not cause discomfort with loud noise.
A good option for installing the station is a basement. It is farther from the well than the caisson, but in the basement it is easy to equip the place for installation. Given the threat of flooding, the unit is installed on a small stable elevation.

A good option for placing the pumping station in the basement: the living quarters are at some distance, the exit to the outside is located approximately at the same level as the highway leading from the well
In the cellars of country houses, utility rooms (laundries, pantries, cellars for storing canned goods) are often arranged, so heating is provided in advance. If, however, the basement is not heated, you need to take care of additional thermal insulation, and even more practical - install an additional radiator.
We do not recommend arranging a boiler room near living rooms, since the noise level of operating equipment is quite high. If you still decide to install a pumping station in the hallway or closet, try to isolate the room as much as possible.
There is another solution, but it will be interesting only to those who visit the cottage exclusively in the summer.
You can purchase a compact portable unit and install it in a small makeshift - a wooden structure resembling a box. The main thing is that the structure is protected from rain. In winter, the pumping station, together with a temporary water supply, is disassembled and placed in a warm room.
Image Gallery
Photo from
In the station format, surface-type pumps are used, the water intake depth of which rarely exceeds 10 m
For pumping water from shallow workings, it is not necessary to equip a small pumping station stationary, it is enough to connect only for the time of pumping water
In the summer season, the pumping station can simply be left on the street if the territory of the garden community is well guarded
The best option is to build a pavilion for the pumping station, next to which you can place a filter system, automation and control devices
If you are not bothered by the noise of a surface pump pumping water quite sonorously, the station is installed in the dressing room or in the utility rooms of the house
For a stationary location of a pumping station pumping water from a deep well using an ejector, it is better to organize a pit or build a caisson
The construction of a deep caisson allows reducing the distance between the water mirror in the mine and pumping equipment. Such a solution sometimes provides the ability to pump water station without an ejector
A hydraulic tank is an essential component of a pumping station. However, it can be installed not only directly under the pump, but also in a separate room
The specifics of the use of pumping stations
Pumping water from the Abyssinian well
Station in the water supply cottages
Construction of a pavilion for a pumping station
Installation of a pumping station in the bath
Priyamok outside the country house
Advantages of installing a station in a caisson
Accumulator as a mandatory component
Pump Station Installation Instructions
Consider the most popular option for installing the station, in which the unit is located on the territory of the house (in the basement or utility room), and the suction line lowered into the well is equipped with an ejector.
Outdoor work - from the well to the house
Outdoor activities include installation of a suction well device - an external ejector, laying a line to the foundation of the house, or preparing a site (utility room) for installing a pump station, if it is located in the basement.
The closer the well is to the house, the better, as this guarantees a stronger water pressure and a minimum of problems with laying the water supply. The main task of the drillers is to equip the well by installing the casing in accordance with the norms and requirements; they are not involved in the external design of the head.
Thus, before starting work, the well is a piece of pipe about 1 m high sticking out of the ground.

There are several ways to refine the casing exit to the surface: from simple connection of pumping equipment to the construction of an underground caisson or a small outdoor structure
We decided to install a well with a pumping station for pumping in the house, therefore, there is no need to create an additional room in the head zone - it is enough to arrange the head itself, observing the tight connection of the pipe to the water supply.
To lay the highway, which will operate year-round, you will have to dig a trench below the freezing level. Accordingly, the casing will also have to be dug up to this level.
Thus, the pipes will go from the top of the well to the hole in the foundation of the house. An important condition is the bias of the water supply in the direction of the source, so that in case of discharge, water can naturally enter the well.
The hole in the foundation should not be too high in relation to the highway - sudden changes and bends adversely affect the pressure force and the functioning of the system as a whole.
After a hole is drilled in the foundation and a trench is dug, it is necessary to perform three actions directly related to the installation of pumping equipment:
- assemble and install the ejector;
- tighten the head;
- prepare the site for installing the accumulator.
The ejector is a cast-iron part with three threaded holes. When connecting it to the pipes, it is necessary to use sealing paste, fum tape or flax, otherwise the tightness will be broken.

The scheme of the ejector. Pay attention to the bottom of the device - this is a filter that traps particles of sand and bottom sediment, it must be installed first, otherwise the equipment will quickly fail
If the outer piece of casing rises high above the ground, the excess part must be cut off. It may be difficult to find the tip for a two-pipe device, in which case you can assemble the device from the tip for a single-tube station. To do this, to the casing pipe at a right angle weld an elbow matching in diameter.
To calculate the length of vertical pipes, which are often used roll-type polyethylene products, it is necessary to add 2 meters to the dynamic water level.
Do not lower the end of the device close to the bottom, as the coarse filter will quickly clog. If the pipes made of polyethylene are not straightened (since they have been stored in a roll winder for a long time), they can be slightly heated with a construction hairdryer.
The ejector is strung on pipes, hermetically fixed and lowered into water. Procedures with sealing joints and fixing the knees should be carried out on a solid foundation. If you try to fix the parts by weight, you risk drowning the ejector in the well. You have to buy a new station, because the ejector is not sold separately.
The outer pipes are laid in trenches and put into a hole in the foundation of the house, then attached to the couplings of a centrifugal surface pump. To fit the pipes more tightly, they must be inserted all the way, tightened by hand, and then fix the result with a gas wrench. Piping the pipeline should only be done after testing the system.
It is better if at the time of immersion of the ejector the pumping station is already installed on a specially prepared base. It must be stable and strong, understood to a height of half a meter.
You can make a concrete elevation, put together a table of wooden blocks or lay brickwork - the main conditions are ensuring safety and stability.

Another option for mounting the accumulator is on brackets mounted on the wall. But keep in mind that any contact of the pumping equipment with the supporting structures will cause noise in residential premises
After the ejector connected to the suction line, the water is lowered, and it, in turn, is attached to the pumping station, you can do the internal work on the home wiring device.
Mounting the shut-off valve and filter
We will not discuss in detail the connection of the tapping points, but consider the installation of a section of pressure pipes to the filter. As main elements inside the house, you can use polymer pipes with a set of fittings of a suitable diameter. Parts from the materials mentioned are easy to install and replace if the need arises.
You need to start by tapping the locking device, which will make it possible to install plumbing equipment and also shut off the home water supply network in the event of an accident or a long departure.
The best option is considered a reliable ball-type valve with an American. If desired, it can be quickly replaced or removed without dismantling the remaining parts of the line.
Buy only high-quality brass taps, as cheap fakes with silumin-containing alloys quickly fail and often cause flooding.

The optimal installation scheme of the pumping station: a ball valve ½ with an American 20 - ½ HP is located directly at the outlet of the internal polypropylene line with a pipe 20
The primary filter should be located next to the accumulator in a convenient place for maintenance. The regularity of washing cartridges - the main filter filling - depends on the saturation of water with lime, iron and other trace elements.
Such inclusions, like coarse sand or pieces of clay, should not be on the inner section of the water supply, they are filtered out before the water enters the membrane tank.
Usually, a mounting key is included with the filter, which facilitates the installation process. The housing must be installed so that, on the one hand, there is a pumping station, and on the other, the wiring of the line to the points of consumption. The pipes along the entire length are fixed to the wall with clamps, at bends and in the places of attachment - with special fittings.

Self-washing fine filters increase water quality, thereby protecting plumbing fixtures (faucets, sanitary ware) from premature breakdowns and reducing the level of maintenance costs
When assembling the network, monitor the tightness of the connections, otherwise the water line may leak when water moves under pressure.
System Operation Check - Test Run
Testing the operation of the water supply system is the final step in connecting the pumping station to the well. In order for the procedure to go without “surprises”, a number of important rules should be remembered.
For the full operation of the equipment, it is necessary to complete the installation of the external water supply and the installation of the internal wiring. To check, you can also turn off the tap of the inside, and use the watering line instead (if it is provided for by the project).

Carrying out preparatory work before starting up the pumping station, be sure to use the instructions! Failure to comply with the manufacturer’s technical instructions may cause damage to the pumping equipment.
Equipment preparation procedure:
- Fill the inside of the accumulator with water (required!) By unscrewing the tank cap and using the funnel. It will take about 10-12 liters of liquid to fill the pump and adjacent pipes.
- Tighten throat cover tightly.
- Check the pressure parameters in the accumulator (they are indicated in the technical specifications and amount to 1.2-1.5 atmospheres). If the pressure is lower, it is necessary to pump air to the desired level using a compressor.
- Run water by opening valves on the main lines.
Only after performing all the above steps can you connect the electrical power. As soon as the engine starts, water will fill all the pipes. It is necessary to ensure that the air is completely removed from the mains, then you can turn off the tap.
Next, you need to monitor the pressure - as soon as it reaches the parameters set by the manufacturer (up to 3 atmospheres), the automatics (pressure switch) should work and turn off the water supply.
If the test was successful, it is necessary to finish the installation of the system: finally fix the pipes inside the building, backfill the street highway.
HDPE pipes - an alternative to steel pipe
Let us dwell on the pipes connecting the submersible equipment and the surface centrifugal pump.
When choosing pipes for outdoor water supply, it is necessary to focus on factors such as:
- convenient transportation;
- easy installation that does not require narrowly qualified knowledge;
- strength, abrasion resistance;
- elasticity and deformation of the form without loss of functional qualities;
- non-toxic, safe for moving drinking water.
All of these requirements are met by pipes made of low pressure polyethylene. Unlike metal counterparts, they do not degrade from corrosion over time. The average service life of HDPE pipes is 50 years.

One of the advantages of HDPE pipes is the availability of a set of various fittings of the appropriate standard (couplings, plugs, adapters) for quick and easy installation
We recommend that you purchase only high-quality marked products, indicating the following data on the outside:
- variety;
- external diameter;
- wall thickness;
- rated and maximum pressure.
On the pipe, which is necessary for laying the pressure line from the well, it is possible to indicate the destination - "drinking". For use in the country, products with a diameter of 32 mm and a wall thickness of 2.4 mm are suitable. The blue bar indicates that the pipes are designed for pumping water (yellow - for transporting gas).

The water supply network of complex design has bends (for example, to provide watering the garden or water supply of the bath). To control the pipe connection points, inspection bricks are made of brick, concrete or plastic
How to insulate the outdoor water supply?
Laying the line below the freezing ground solves the problem of additional thermal insulation, but it is not always possible to dig deep trenches. It is necessary to place the pipes at a shallow depth, having previously insulated them from all sides.
Previously, they used the only acceptable method - they wrapped the products with heat-insulating material, for example, with a mineral wool sheath, then with waterproofing so that water did not penetrate outside.
Now there are several modern methods that increase the efficiency of heat saving. For example, the use of pipes factory-made enclosed in a rigid polystyrene shell.
The most effective way is to use a heating cable. The pipeline for water supply has a diameter of 32 mm, which means that it is enough to stretch the cable along the highway, fixing it directly to the pipe.

Cable manufacturers ensure that it protects the water supply even at -50º C on the surface. Thanks to the built-in sensors, electric heating is maintained at + 5º С
The only minus of the electric heating system is its dependence on power supply. However, the owners of suburban housing, constantly living offline, always have in stock an alternative source of energy - a gas, diesel or gasoline generator.
They will help you understand the nuances of installing a pumping station for wells.
Video # 1. Useful tips for self-assembly and installation of the pumping station:
Video # 2. Features of installing a pumping station in the basement:
Video # 3. Installation instructions for the Grundfos MQ pumping station:
We recommend independently connecting pumping equipment only to those who have already encountered installation, replacement or repair of pumping stations. For newcomers, it is better to turn to experienced people in this matter, or at least perform all the work under their control.
Want to talk about how you installed a pumping station to take water from your own well or well? Do you know the nuances of connecting equipment that are not noted in the article? Please write comments in the block below, ask questions, share your impressions, useful information and photos on the topic of the article.