Wooden houses are chosen as housing for many reasons: one is contraindicated to live in concrete "boxes", others like beautiful log houses. However, living in them is closely related to such a concept as security. That is why the wiring in a wooden house is considered one of the key aspects.
We will talk about how to make the wiring of power supply in a wooden house. We will show you which schemes, consumables, and wiring products are used in laying lines along the walls of timber or logs. Based on our tips, you can make a secure and reliable network.
Wooden house power supply project
Even if all logs, boards and boards are treated with flame retardants, they remain vulnerable to accidental fire. For this reason, the stages of the installation of the electrical system - from design to the installation of sockets and switches - must be known both by skilled "home-made" and owners who control the work of hired builders.
According to the legislation of the Russian Federation, for residential buildings with a power consumption of not more than 15 kW, the design of power grids is not required. But it is necessary to provide the scheme and data on the total power consumption to the company supplying electricity. This is necessary for calculating the allocated power on the line and installing the meter.

When concluding an agreement, some electricity supply companies still require a project that includes, in addition to the internal wiring diagram, installation points for sockets, switches, junction boxes, an electrical panel with a meter
In the process of developing a project, you need to take into account all the nuances: the exact location of electrical installations, the choice of cable and wiring method, the need for grounding, etc. How is the design of the project and preparation for installation work, we will consider in more detail.
Step # 1 - drawing up a scheme and work plan
You can do the design yourself if you have experience with such work, or with the help of specialists, concluding an agreement with the design organization.
A professionally prepared document contains the following items:
- circuit board;
- electrical installation plan;
- calculations for installing the ground loop;
- conclusions outside the home, if any, autonomous sources of electricity;
- equipment installation plan with specifications;
- if agreement is ahead - a package of permits;
- explanatory note.
But first, you should contact Energosbyt to obtain technical specifications - technical conditions that are signed in accordance with SNiP.
Least of all papers will have to be collected by owners who draw up a connection with a capacity of less than 15 kW. They need to write a list of electrical appliances and calculate their total power. If the power consumption is more than 35 kW, a linear power supply circuit is needed. For 380 V networks, a three-line diagram is drawn up.

As a basis for drawing up a scheme, they usually take a house plan with verified dimensions and directly in it indicate the location of lighting devices, switches, sockets, powerful equipment - boilers, washing machines, refrigerators
In the kitchen, 1-2 outlets are not enough, as in the bedrooms, it is necessary to plan the installation of outlet blocks. The location of the power points is not strictly regulated by either the PUE or the building codes. The height of the installation of sockets is justified only by the ease of use.
In corridors it is rational to use walk-through switches, in rooms - ordinary 2-3-key switches. They are installed at a height of 90 to 160 cm.

The scheme should include lighting of the local area, as well as the garage, summer kitchen and baths - usually the power is scattered on all objects connected to a dedicated line
The location of the electrical panel should be planned so that it has easy access, but only for adults - that is, it is better at a height of 150 cm.
All the rules regarding the project apply to any houses, not just wooden ones. But the risk of accidental fire with improper planning or installation of networks is higher precisely in buildings made of wood.
Step # 2 - study the rules and requirements for wiring
If the events are conducted independently and questions arise regarding the use of certain materials, as well as cable laying technologies, one should rely on the norms and rules for connecting electricity in a wooden house, as set out in the EMP and SNiP.

Installation according to the requirements of the PUE is more complicated, more expensive, but more expedient than random actions. It must be remembered that it is the observance of the rules that will protect your home, protect it from fire, and wiring from overload, short circuit and leakage of currents
For example, one of the requirements is the use of only copper wires, the cross section of which is selected according to the network load. They are more expensive, but have better conductivity and mechanical strength, serve for a long time and are easy to install.
A few more requirements, the implementation of which will save the wooden house from harm:
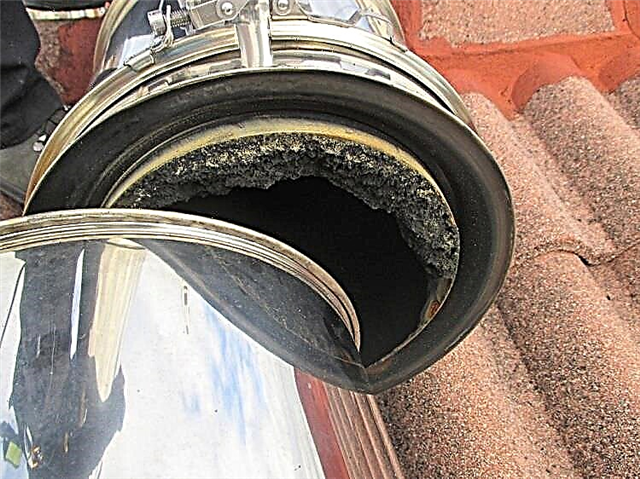
- To protect against damage, condensation, dust contact, the cable is placed in metal pipes, metal flexible sleeves or plastic boxes.
- The joints of the protective pipes or ducts must be carefully sealed.
- It is forbidden to lay electrical wiring through ventilation shafts and channels.
- Before buying a cable, you must correctly calculate its cross-section, which should correspond to the current load.
- For closed wiring, it is recommended to use only metal pipes, flexible and self-extinguishing hoses are not suitable.
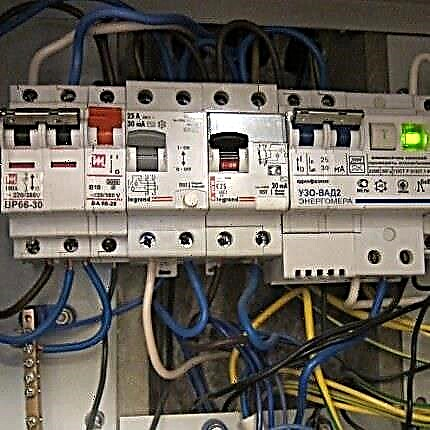
- One of the conditions for full protection is a well-assembled electrical panel with a set of circuit breakers and RCDs.
It is also not recommended to save on materials and buy cheap products from unverified manufacturers. If there is no experience in the electrical installation of closed wiring, it is better to make an open one - there are many ways to safely install and decorate.
Step # 3 - preparing materials and tools
Before making an estimate, it is necessary to determine which tool is useful and how much installation material you need to purchase. This will help a pre-compiled diagram indicating all electrical installations and cable broaches.
For installation, both manual and power tools will be required:
- a hammer;
- screwdriwer set;
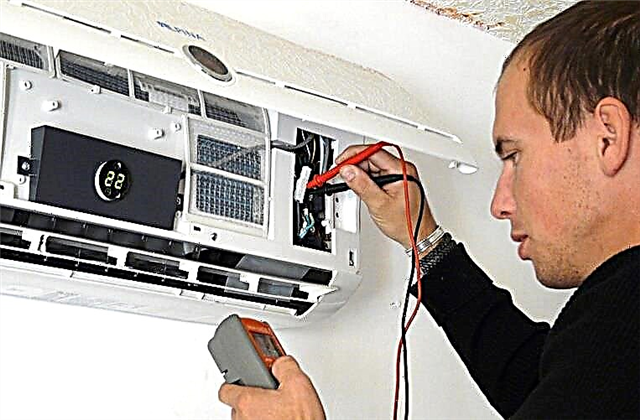
- voltage indicator (tester);
- pliers;
- construction knife.
A distinctive feature of tools for electrical work - insulated handles. In addition, protective gloves and rubber-soled shoes should be prepared. Materials are selected, taking into account the load, installation method, subsequent decorative finish. The main products will be based on the following products:
Image Gallery
Photo from
The best option for a wooden structure is a three-core VVGNG wire in non-combustible insulation with a diameter of 1.5 mm² for lighting lines, a diameter of 2.5 mm² for sockets, switches, washing machine, air conditioner
It is recommended to install 2 interconnected shields: with a meter for taking readings - outside the house, with protective devices - inside. A single option is also suitable - a metal mini-cabinet for 15-20 seats with a door and a lock
The electricity meter monitors electricity consumption, takes indicators to pay for the services of the supplying company. If you choose a two-tariff device, you can significantly save on utility bills
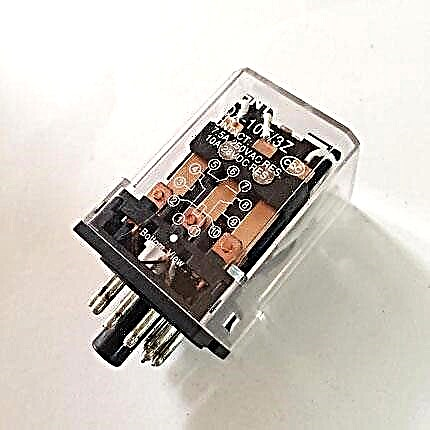
Circuit breakers protect individual lines from overload and short circuits. Depending on the current load, according to the scheme, machines are installed from 6A (lighting) to 16A (air conditioning, stove or group of outlets in the bedroom)
RCD protects the owner of the house from current leakage, is installed on a group of machines. 10 mA devices are designed for bathrooms and other rooms with high humidity, 30 mA for other lines (sockets, lighting)
In addition to the boxes themselves, in which the communication of wires is carried out, insulating materials are required: clamps, electrical tape, express connectors, terminals. Boxes for indoor installation should be metal
Preference should be given to overhead models with a ceramic base. Internal contact groups should be copper or bronze - less susceptible to oxidation, longer serve, have greater thermal conductivity
Overhead type sockets are easier and more convenient to install than built-in sockets. They are ideally suited for open mains applications. When closing, the invoice model can be quickly changed, as well as the wires leading to it
Metal electric shield
Electricity metering device
Set of circuit breakers
Residual Current Device
Junction boxes for connecting wires
Overhead switches
In addition, it is necessary to purchase insulation materials for wiring - a metal hose, duct or cable ducts, mounting clips, self-tapping screws, aluminum tape for insulation, metal pipes for adapter sleeves. It is recommended to buy a cable with a margin of 10-15%.
After drawing up the project, calculations, coordination (if necessary) and preparation of materials, you can begin to work.
Stages of electrical installation in a wooden house
The process of equipping electrical networks includes not only the installation of wires, everything is important here: input of the power cable into the house, grounding device, filling the electrical panel. Some difficulties are associated with the planning and arrangement of hidden wiring. Any activities should be carried out in accordance with the norms and requirements of SNiP and PUE.
Stage # 1 - bring electricity to the building
Over the past decades, electricity consumption has increased, and along with this, requirements for arranging the input of an electric line into a house.
There are two ways to enter cables:
- aboveground or air, implemented using high supports;
- underground or trench.
The first method relates to the traditional ones - power communications are pulled from the power line directly to the house. To do this, use an insulated polyethylene wire SIP, which is called self-supporting. It does not require the installation of an additional cable and is supported by its own bearing capacity.

If the lead-in line is longer than 25 m, an additional support must be installed. Often an external electrical panel is placed on this support (pillar)
The underground way to enter the power line is more modern. The wires are laid in a trench with a depth of 0.8 m or more. The protection zone on the surface of the ground is marked with signs. Underground wires, additionally insulated and placed in a metal pipe, are protected as much as possible from moisture, damage and load.
The input of the wire into the wooden structure is carried out by means of a metal sleeve, which can be made from a piece of thick-walled pipe. The main purpose of the sleeve is to prevent contact between the cable and the wooden parts of the house.
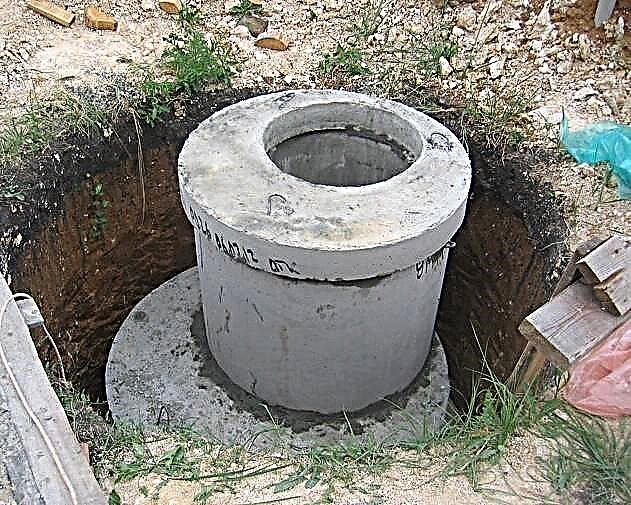
Stage # 2 - install the ground loop
There is an old proven grounding device for a private home. Not far from the point of entry of the power cable into the house, a triangular pit 0.5 m deep is excavated in the ground. Metal rods are driven into the corners of the resulting triangle - pins, fittings, connected with thick wire or a corner.

The ground loop does not have to be in the form of a triangle; round, rectangular and linear versions are also designed. The number of electrodes may be more than three
Then a metal conductor is drawn from the circuit to the pole or wall, the end of which is connected to the grounding bus in the electrical panel. The lightning rod is also included in the circuit. The underground structure is covered with soil.
Stage # 3 - equip the electrical panel
The switchboard of a wooden house is the “brain” of the power grid, on which the operation of the system and the safety of residents depend.
In order for it to function correctly, it is necessary to observe a number of important rules:
- the dimensions of the shield are selected according to the number of RCDs and machines, but with a margin - free places on DIN rails;
- in addition to automatic machines and RCDs, it is necessary to allocate places for the electric meter, grounding and zero buses, connected wires;
- if the shield is placed on the street, it must be protected from rain;
- installation height - at least 1.5 m so that children or animals do not have access.
The rating of the machines, as well as the cross section of the wire, depends on the current load. The parameters of the input machine are focused on the limit of e / energy from the supplier.

Sealed box with the ability to take meter readings and a convenient door - reliable protection of electrical installations from rain and possible mechanical damage
To connect or connect wires, it is recommended to use more efficient and replaceable terminals, twisting is not suitable, and soldering takes a lot of time and requires proven skills.
Stage # 4 - wiring correctly
Option 1. Installation of concealed wiring. Before starting installation work, you should determine the type of wiring. The fact is that without protection it is impossible to fix the cable inside wooden elements: timber, logs, etc.
According to PUE-6, there is the possibility of wiring covert wiring, but using a metal pipe.

Installation of wires in steel pipes. Plastered furrows, monolithic factory structures are practically not used, and flexible corrugations and boxes are not considered strong enough - they burn out when ignited
Hidden wiring is risky and difficult for independent execution: each wire will have to be placed inside a metal pipe, and the joints of the two pipes should be hermetically fastened together.
Firefighters do not recommend using this method, but if it is still important for the house owners to disguise the wires under the cladding, you must follow the instructions below:
- Prepare strobes in logs / timber.
- Install junction boxes so that they are accessible after finishing work.
- Drill holes in walls and partitions and insert bushing sleeves with machined edges into them.
- In places of fastening of switches and sockets also install metal mounting "glasses".
- Choose pipes by diameter so that the wires occupy no more than 40-50% of the internal space.
- Sand the ends of the pipes, like the sleeves, or secure them with plastic rims so that the wires do not bend or break.
- Fix pipes on the ceiling or walls with clamps, to metal sleeves - by means of flaring.
- Route the wires according to the diagram inside the pipes.
- Connect the wires in the junction boxes, connect them to the electrical installations and the electrical panel.
After that, it is possible to clad wooden surfaces with lining, drywall or other material.
To protect the metal from corrosion, galvanized or stainless steel pipes are chosen. Plain steel is coated with anti-corrosion paint. If increased humidity is noticed, the pipes are laid at an angle - to drain the condensate.
Option # 2. Installation of open wiring. Open wiring is in sight, mounted on top of wooden surfaces, so it should look attractive.
Corrugated pipes, rigid plastic boxes and baseboards made of non-combustible material are used for masking.But many do not like the "office" design, and they use retro wiring specifically designed to create an internal electrical network of a wooden house.
Image Gallery
Photo from
Import wires are expensive, domestic ones are 25-30% cheaper. To save on the network device for a large house, take BPVL or RKGM cords in cotton or fiberglass winding and twist them
Standard products have a height of 1.8-2.4 cm, can be painted in any shade. For fastening the rollers on a wooden wall, thin and long screws are used, which are often supplied
Junction or junction boxes must match the wiring in appearance and be completely on the surface. Masking or drowning them in a tree is prohibited by fire regulations
The electrical installations to which the twisted wires lead must also match the style. Well-known manufacturers (Cordon Dor, Gambarelli) produce collections of products - beautiful, with excellent technical characteristics, but quite expensive
Twisted three-wire retro cable
Ceramic mounting insulators
Junction boxes for open wiring
Retro style switches and sockets
If the budget is small and retro wiring is not affordable, boxes made of self-extinguishing plastic are suitable. You can choose the color that is most suitable for wall cladding: white, brown, beige, “wood look”.
Installation Instructions:
- Select cable channels and skirting boards corresponding to the diameter of the wires.
- Remove the upper part - the cover, and fix the base on a wooden surface with self-tapping screws.
- At the joints, in the corners, install junction boxes for connecting wires.
- Install, in accordance with the rules for installing electrical installations in wooden houses, sockets, switches.
- Place the wires in the cable ducts.
- Make a connection on all lines.
- Attach the upper parts - covers, snap in.
Full protection is considered to be where the wires never come in contact with a wooden surface and do not protrude outward.
Stage # 5 - install switches and sockets
Installation of overhead electric points is carried out according to general rules, with one exception - an insulating non-combustible material, for example, aluminum or asbestos, is additionally placed under each device.
Switches are mounted on the same principle as sockets.

If the inside of the device is partially recessed into a timber or log, you only need to use metal sockets - protective sleeves that will not ignite and will not melt when shorted or accidentally ignited
For accurate installation, often use linings and wood inserts. To reduce the risk, they must be treated with a flame retardant - additional protection does not hurt.
Video # 1. Risks of improper installation and recommendations for proper arrangement:
Video # 2. General rules for wiring devices:
Video # 3. Overview of the electrical installation in a log house:
Even knowing the basics of electrical work, do not start independent wiring in a wooden house without the appropriate education, skills and experience. There are a number of nuances and rules known only to qualified installers.
Please write comments in the block below. Ask questions on obscure and interesting points, post photos on the topic of the article. Share useful information that may be useful to site visitors.