Garage - the room is relatively small, but its arrangement should not be treated carelessly. It should protect the vehicle from external influences: bad weather, theft, etc. But inside, you need to create a microclimate useful for people and technology. This is easy to achieve if the hood in the garage is arranged correctly.
We will tell you how to better organize ventilation in the garage space, how to strengthen it if necessary. The article describes all types of systems tested in practice, the specificity of their device is analyzed. Based on our recommendations, exhaust air removal will no longer be a problem.
Why ventilate the garage?
Of course, a garage is a technical and not a residential facility, although some car owners may not agree with this statement. If a car enthusiast spends a considerable part of his personal time in the garage, and even uses the basement or the garage itself to store food supplies, all the more you should be concerned about the problem of proper air exchange in such a specific room.
For starters, there is a high concentration of exhaust gases, fuel vapors and other process fluids. Even a short stay in such an atmosphere is extremely harmful for a person.
Image Gallery
Photo from
Natural ventilation scheme for the garage
Air exchange system in a heated garage
Disposal of substances harmful to owners
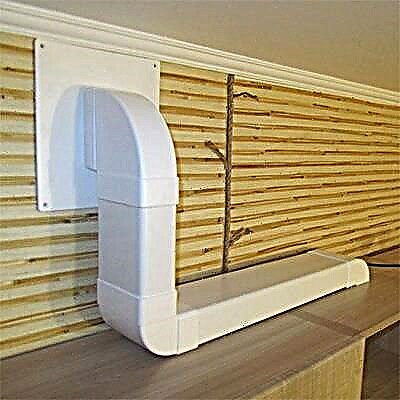
Exhaust pipe ventilation system
The second problem associated with improper ventilation of the garage is excess moisture. Water vapor accumulates indoors and condenses on various surfaces, including the car. As a result, the risk of occurrence and the rate of corrosion processes increases sharply, in other words, the vehicle rusts.
Often in garages or cellars arranged under them they store vegetables, canned food, other products or things that could not be found in a house or apartment. Contact with moisture, as well as exposure to technical fumes will not bring all these objects any benefit. And the problem can be solved simply, just take care of effective ventilation.

If ventilation is poor, condensation droplets may appear on the walls and ceiling of the garage. Subsequently, this moisture enters the vehicle, which may cause corrosion.
What you need to know about room ventilation
Everyone who has at least once encountered the problem of indoor air exchange knows that they distinguish between a natural, forced and combined ventilation system. The first option is simple: it is based on the difference in air temperature inside and out.

Organization of ventilation of the garage without a viewing hole: arrows “a” indicate the direction of air flow, letter “b” indicates the location of the supply air vents, “c” indicates the ventilation duct
As you know, warm air rises, and cold air goes down. The idea is that cool air masses enter the room from the street, rise up and naturally leave through the exhaust outlet. At the same time, they must be replaced by new streams of fresh air that flows outside.
In the garage, such ventilation is easy to organize. For this, it is necessary to provide sufficiently wide openings for the inflow and exhaust of air, but the temperature difference inside and outside the room will also be of great importance.
There are no problems with this condition in winter, but in summer, when the heat is almost the same everywhere, the efficiency of natural ventilation decreases dramatically.

To ensure the supply of fresh air to the garage, instead of a hole in the wall, special supply grilles can be installed on the gate
An alternative in this situation is forced ventilation, i.e. using additional funds. Special fans are installed in the supply and exhaust openings, which, depending on the purpose, blow air into the room or remove it.
But to put two devices at the same time for one small garage is not always reasonable and justified from an economic point of view. It is more profitable to use a combined ventilation system, for which only one device is needed.
For example, a supply fan is installed, it pumps in fresh air, and the exhaust air masses are forced out through the exhaust outlet.
In garages, an exhaust system is considered more acceptable. Install a fan that effectively removes air saturated with harmful fumes and excess moisture. Fresh air masses will naturally enter the room through the supply side of the system.
How to organize natural ventilation?
To ensure proper natural ventilation of the garage, you need to remember a number of basic rules:
- An air inlet is placed below, about 10 cm above the floor.
- An exhaust hole is made at the top, almost under the ceiling or even directly in the ceiling.
- The best option for placing these holes is diagonally, i.e. if the inflow is carried out in the lower front corner, then the hood must be put in the upper far corner.
- The size of the holes must be correctly calculated in order to ensure sufficiently intense air exchange.
- The inlet must always be two to three times larger than the dimensions of the hood.
Well, if the ventilation was calculated and created during the construction of the garage. If this moment was missed, you will have to perform a number of relatively simple installation work. It also happens that ventilation is provided, but does not give the desired results. In this case, you will need to improve the system, for example, by installing an exhaust fan.
If you consider the natural ventilation operation ineffective, then there is the opportunity to upgrade the system, for example, by increasing the height of the exhaust pipe:
Image Gallery
Photo from
To increase the height of the hood we get a plastic pipe and a deflector to it. We cut the three-meter pipe purchased at the store to 2.1 m in order to reduce windage
We fix the deflector with two self-tapping screws so as not to worry and not think that a light plastic part can be blown away by the wind
For the upcoming fixation of stretch marks we make a device. For its manufacture, 2 clamps are required, more precisely those parts to which the bolts are welded
We find on the roof of the garage a place for installing an exhaust pipe, markup
We transfer the necessary tools and materials to the roof of the garage, from which we will construct the structure and fix it
According to the markup made in advance by the grinder, we cut out the hole, trying to do as accurately as possible
If you get lost while marking, and cut a hole not directly above the hood, increase it with the same grinder
In the corrected hole we install a piece of asbestos pipe. it will serve as a guide for exhaust
Step 1: Purchasing Materials for the Device
Step 2: Fixing the deflector with self-tapping screws
Step 3: Assembling the fixture
Step 4: Marking the installation location of the chimney
Step 5: Transfer tools and materials to the garage roof
Step 6: Sawing a hole with a grinder
Step 8: Fix Markup Defects
Step 8: Installing the Asbestos Shroud into the Hole
Upon completion of the preparatory process, we proceed directly to the assembly of the system and to fixing the high pipe with stretch marks:
Image Gallery
Photo from
Step 9: Preparing Anchors for Upcoming Installation
Step 10: Install Anchors to Attach Stretch Marks
Step 11: Attaching a Metal Cable to Anchor
Step 12: Attaching the Cable Through Lanyards
Step 13: Foaming the joint of the pipe and the roof
Step 14: Align the vent pipe
Step 15: Cut off excess foam around the chimney
Step 16: Processing the mating of the pipe with the roof mastic
How to calculate everything correctly?
Ventilation calculations in many cases require special knowledge and the use of complex techniques. If there is a desire and allows the wallet, the creation of the project can be ordered from specialists. Fortunately, a garage is a small room with a simple configuration.
The dimensions of the ventilation holes are calculated by the formula:
Pcut= Ngar×15
Wherein:
- Pcut - cross-sectional area of the ventilation hole;
- Pgar - garage area;
- 15 - coefficient reflecting the size of the ventilation hole per unit area of the room.
Those. you need to multiply the area of the garage by 15 mm. According to this simplified technique for a garage of 24 square meters. m. (6 * 4) you will need a supply hole with a diameter of 360 mm. These calculations are very arbitrary, since the technique does not take into account the height of the room and its other features.
In practice, these indicators can vary. For the above garage area of 24 square meters. in one particular case, two 150 mm pipes on the inlet and one such pipe on the exhaust were successfully used.
To increase the efficiency of natural ventilation, you can use additional tools:
- The deflector is a special cap that is installed on the edge of the vertical section of the exhaust pipe to create a rarefied atmosphere inside the structure and accelerate the movement of air masses.
- The diffuser is a weather vane for the outer part of the supply pipe; wind pressure is used for its operation.
- An ordinary incandescent lamp - it is installed inside the exhaust pipe and heats the air flow, accelerating its movement.
These simple devices can significantly improve the quality of ventilation in the garage.
The following principles, which we recommend that you read, will familiarize yourself with the general principles of calculating the power of ventilation systems.
How to correctly install?
To organize the proper ventilation of the garage, you will need to make at least two holes: for the influx of fresh air, as well as for the output of streams saturated with harmful fumes and excess moisture. The inlet is made in the lower part of the outer wall, about 10-15 cm from the floor.

To equip the ventilation in the garage, you need to make wall holes that correspond in size and configuration to the characteristics of the pipe
Thick walls of residential premises are drilled using special equipment, but such difficulties are not needed for garages. Most often, drilling a hole of a suitable diameter is performed using a hammer drill.
After that, a pipe or pipes for inflow are inserted into the hole and their position is fixed. To seal the gaps between the pipe and the wall material, use foam. The outside of the hole should be protected with a special grille or diffuser.

Outside, the entry point of the supply pipes led through the garage wall should be covered with decorative grilles to protect the room from the penetration of small rodents, insects, etc.
The cross section of the ventilation duct can be made not only round, but also square or rectangular. For installation you will need pipes of the appropriate configuration. Typically, ventilation pipes with circular cross section are used for garage ventilation.
This is the cheapest and most convenient option, in addition, they create minimal resistance to air flow. Metal pipes and plastic constructions are suitable for ventilation.

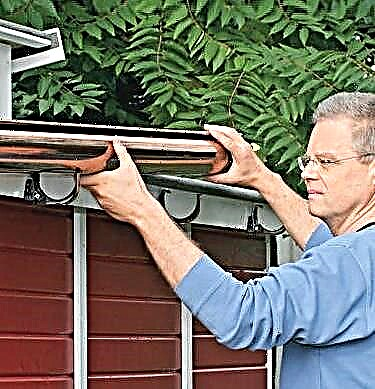
Garage ventilation exhaust duct pipe must be brought up about 50 cm above the roof level to provide good traction
The hood is made under the ceiling. The pipe is led horizontally through the wall and then a vertical piece is mounted. It should be long enough.
An hood is considered optimal, which rises above the roof by at least 50 cm. A hood-deflector is often installed from above. The inside of both the supply and exhaust openings should be covered with a decorative grille.
Combined and forced ventilation
As noted above, the natural ventilation of the garage is effective only under certain environmental conditions, i.e. with a sufficient difference in temperature inside and outside. The use of forced ventilation eliminates this type of problem.

The scheme of combined ventilation of the garage using an exhaust fan. Such a system is not too demanding on the location of the hood
Effective air removal in the garage is more than relevant, since the level of pollution here is much higher than in residential premises. Therefore, the owners of garages prefer the exhaust version of combined ventilation. Implementing a project of this type is not so difficult.
To do this, you need to purchase an exhaust fan and install it at the entrance to the pipe. If such a pipe is missing, it must be installed. This is done in approximately the same way as when installing natural ventilation. Calculations, materials and tools will be needed the same, calculations are carried out in a similar way, but there are several differences.

An exhaust fan is an easy-to-install and easy-to-use device to which power must be supplied. Using an automatic timer, you can improve the quality of ventilation
With combined ventilation, it is not necessary to install the hood strictly diagonally from the air inlet, although this position is desirable. You can also choose another place, both for the supply and exhaust vents. But the first one still needs to be placed below, and the second - at the top.
Another important point is the presence of furniture and other items in the air flow path. This is a common mistake when designing ventilation. The fewer such obstacles, the better the air exchange will be. An exhaust fan should be installed in the upper pipe.
This can be a channel model, which is installed inside the pipe, or an invoice option, such devices are mounted directly on the wall. After that, the fan should be connected to the power supply.
To improve the functioning of such a hood, you can provide the fan with additional automatic control modules. For example, a timer that will turn the device on and off at a specific time.
This will slightly reduce energy costs, as well as provide ventilation for the garage, even in the absence of its owner. If the garage already has natural ventilation, but it does not work efficiently enough, the best solution would be to install an exhaust fan in a ready-made duct.
If in the winter period natural ventilation is carried out quite well, then the fan can be used only in the summer.
Forced ventilation involves the installation of both the supply and exhaust fans in the corresponding openings. In ordinary garages, such systems are usually not used, since the problem is solved using simpler options: a natural or combined system.
Making forced ventilation in the garage makes sense only in cases where you just can not do without it. For example, for a garage located underground, forced ventilation is the only option. It happens that in the garage it is planned to carry out paintwork or other work in which good air exchange is of particular importance. Here, forced ventilation will come in handy.
Those who wish to equip the garage with an effective exhaust system, required to remove toxic substances generated during welding and painting, it will be useful to familiarize yourself with the following photo selection. It represents the process of constructing a hood with a movable sleeve from a corrugated pipe:
Image Gallery
Photo from
A pair of ventilation holes, which were originally two on each side of the gate, is equipped with plastic corner bends. Corrugated pipe will be attached to them.
A mechanical ventilation system needs power. To do this, draw a power line and put a socket specifically for the fan
At the level of the location of the exhaust ventilation openings, we install a duct fan, which we pre-attach to the trim board
Corrugated pipe cut into two sleeves. The first section will be laid from the exhaust outlet to the fan, the second - from the fan to the farthest projected place of work, for example, up to half the height of the inspection hole
We connect the corrugated duct to the exhaust outlet and drive it to the fan. We fix the pipe on the wall with clamps
We install a bracket with a metal rod on the ceiling and drive an air duct to it
In order to provide the opportunity to clean the air duct, fixing it on the ceiling so that it does not interfere with movement around the garage, we put the bracket fixing part
In order to increase the efficiency of collecting toxins with a chimney, we equip the sleeve with a funnel. From the wire we make the frame, which we wrap with foil. We fix the funnel with tape on a metal ring, so that it can be removed from the pipe and installed again
Stage 1: Equipping the exhaust openings with corner outlets
Stage 2: Fan wiring device
Stage 3: Mounting the duct fan
Stage 4: Preparing the corrugation for installation
Stage 5: Routing the duct to the fan
Step 6: Install the bracket on the ceiling
Step 7: Attaching the Counter Bracket
Step 8: Design of an exhaust funnel for the duct
Cellar and viewing hole
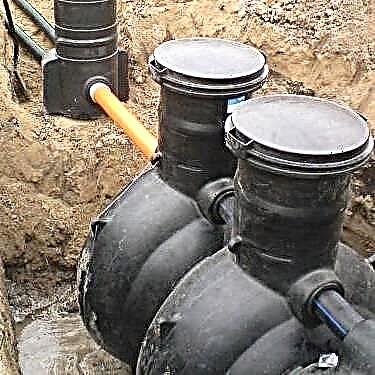
Above, the option of venting a conventional garage was considered. If inside there is a basement and / or viewing hole, these facilities should be taken care of separately. In the case of the basement, you will have to arrange a separate ventilation duct. This is necessary, since much more moisture accumulates at the bottom than at the top of the room.

Ventilation scheme of the basement located in the garage: the supply pipe should be lowered as low as possible, and the exhaust pipe should be brought up high
If there is no ventilation, this moisture will penetrate into the garage and harm the vehicle stored in it. Ventilation, which is arranged in the garage, even when using forced methods of inflow and removal of air, usually cannot provide a sufficiently intense exchange of air masses.
To effectively ventilate the basement, two holes should be made: supply and exhaust. It is recommended that the air in the southern part of the cellar be secured, and the air outflow from the north.
A supply pipe is usually introduced into the cellar through the garage floor and lowered as low as possible. The hood is arranged in the opposite corner, this pipe is led up and out through the floor of the garage. As with the ventilation device in the garage, the cross section of the inlet openings should be two to three times larger than the dimensions of the hood.

Here is a variant of the organization of natural ventilation of the garage, in which there is a basement and a viewing hole, for which separate ventilation ducts are made
The greater the difference in height between the edge of the feed and the hood, the more effective the ventilation of the cellar will be. A difference of three meters or more is considered optimal. To increase the difference, the vertical part of the exhaust pipe, which is displayed on the street, you just need to make it higher. You can also install a deflector or a protective cap here.
Sometimes the installation of the supply pipe for some reason is not possible. In this case, it is recommended to leave the hatch slightly ajar so that the fresh air entering the garage moves into the basement. The lack of fresh air will make all efforts to organize an efficient extract from the cellar in the garage useless.
If the garage is heated, condensed moisture may appear on the chimney in winter. To prevent icing of the pipe, a special condensate cup is installed.
For an unheated garage, this measure is not required. In winter, food and items stored in the cellar should be placed no closer than half a meter from the air inlet, otherwise they may freeze.

Scheme of natural ventilation of a garage with a viewing hole: arrows “a” indicate the movement of air flows, “b” - location of ventilation slots for a viewing hole
The viewing pit is a small object in volume, therefore, they usually do not provide separate ventilation for it. Nevertheless, it is worth taking care of a good air flow. To do this, on the side of the inspection pit that faces the supply air vent of the garage, you need to make slots of about 10-15 cm. You can open the two sides of the pit in a similar way.
On the side of the hood, you also need to make such a gap, but it should be twice as narrow. For safety's sake, you can cover these slots with boards in some places. When installing the car, make sure that it does not overlap the exhaust gap, as this is dangerous for the vehicle.
The rules and options for the ventilation device in the garage for independent masters are described in the next article.
Video # 1. Interesting and detailed information on the ventilation of a garage room is described in this video:
Video # 2. This video demonstrates the operation of the exhaust duct fan:
Video # 3. Here you can see the experience of creating a homemade hood for a garage, made from improvised means:
Organizing a quality hood in the garage is not so difficult. It is necessary to choose the right system and install it, or to improve an existing ventilation option. This will positively affect both the condition of the car and the health of the owners of the garage.
Want to talk about how you made or upgraded ventilation in your own garage? Have useful information or have questions while reading the article? Please write comments and leave a photo on the topic in the block below.